|
OpenStack Newton : Configure Horizon
2016/11/17 |
|
Configure OpenStack Dashboard Service (Horizon).
It's possible to control OpenStack on Web GUI to set Dashboard. |
|
| [1] | Install Dashboard. |
|
root@dlp ~(keystone)# apt-get -y install openstack-dashboard
|
| [2] | Configure Dashboard. |
|
root@dlp ~(keystone)#
vi /etc/openstack-dashboard/local_settings.py # line 30 uncomment and add own hostname ALLOWED_HOSTS = [' dlp.srv.world', 'localhost' ]
# line 56: uncomment like follows
OPENSTACK_API_VERSIONS = {
#    "data-processing": 1.1,
    "identity": 3,
    "volume": 2,
    "compute": 2,
}
# line 75: uncomment OPENSTACK_KEYSTONE_DEFAULT_DOMAIN = 'default' # line 139: uncomment and add Memcache server
CACHES = {
    'default': {
        'BACKEND': 'django.core.cache.backends.locmem.LocMemCache',
        'LOCATION': '10.0.0.30:11211',
    },
}
# line 163-165, change like follows OPENSTACK_HOST = " 10.0.0.30 "OPENSTACK_KEYSTONE_URL = "http://%s:5000/ v3 " % OPENSTACK_HOSTOPENSTACK_KEYSTONE_DEFAULT_ROLE = " user "
systemctl restart apache2 memcached
|
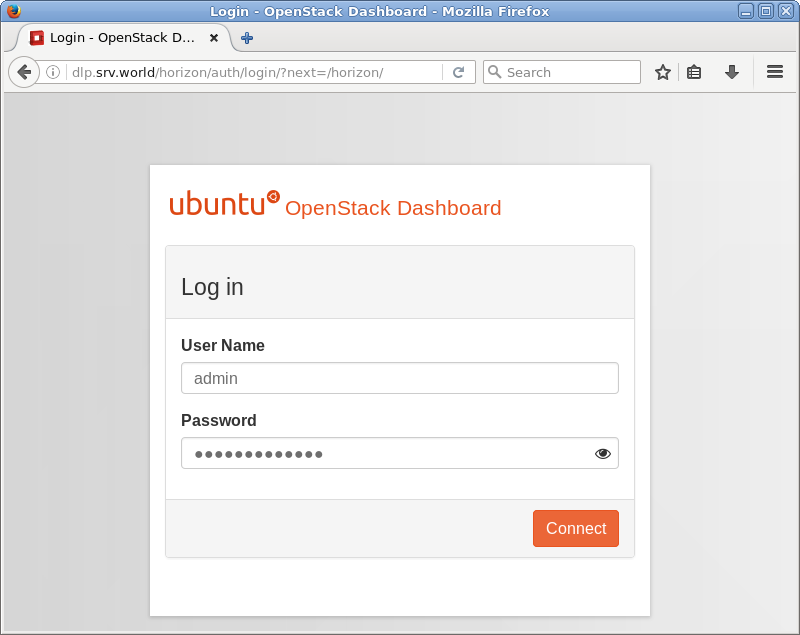
| [3] | Access to the URL below with web browser. ⇒ http://(your server's hostname or IP address)/horizon/ After accessing, following screen is displayed, then login with admin user which you configured when Keystone bootstraping. |
|
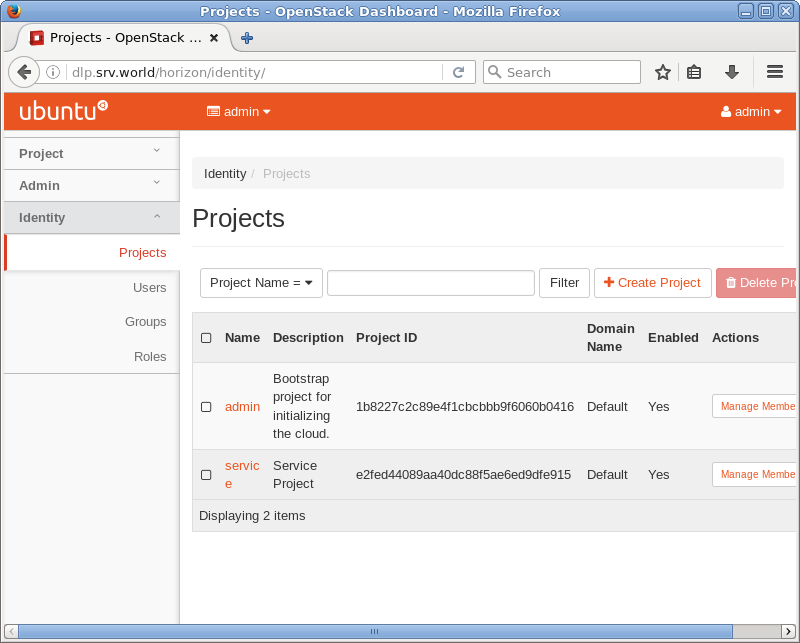
| [4] | If it's OK to login normally, following screen is displayed. You can control Openstack on this Dashboard. |
|
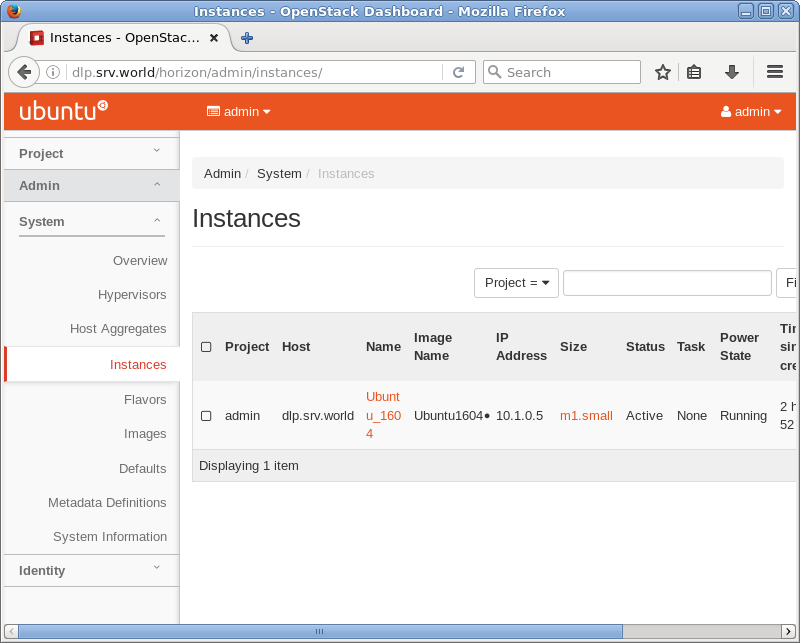
| [5] | To access an instance, Click "Instances" on the left menu. Then, instances' list is shown on the right, next Click the name of instance you'd like to access. |
|
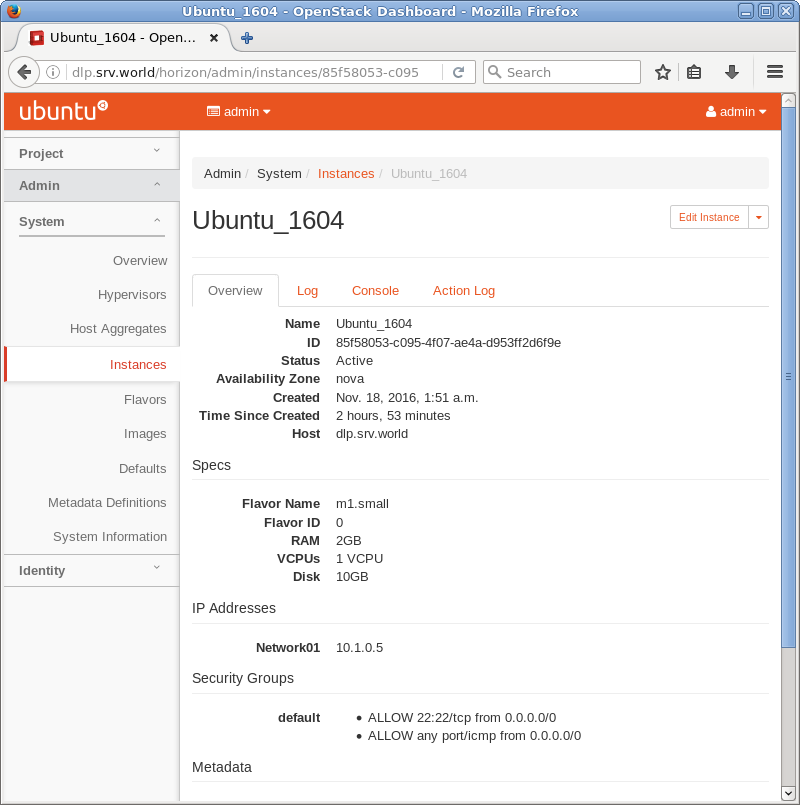
| [6] | The description of instance is shown, next, Click "Console" tab. |
|
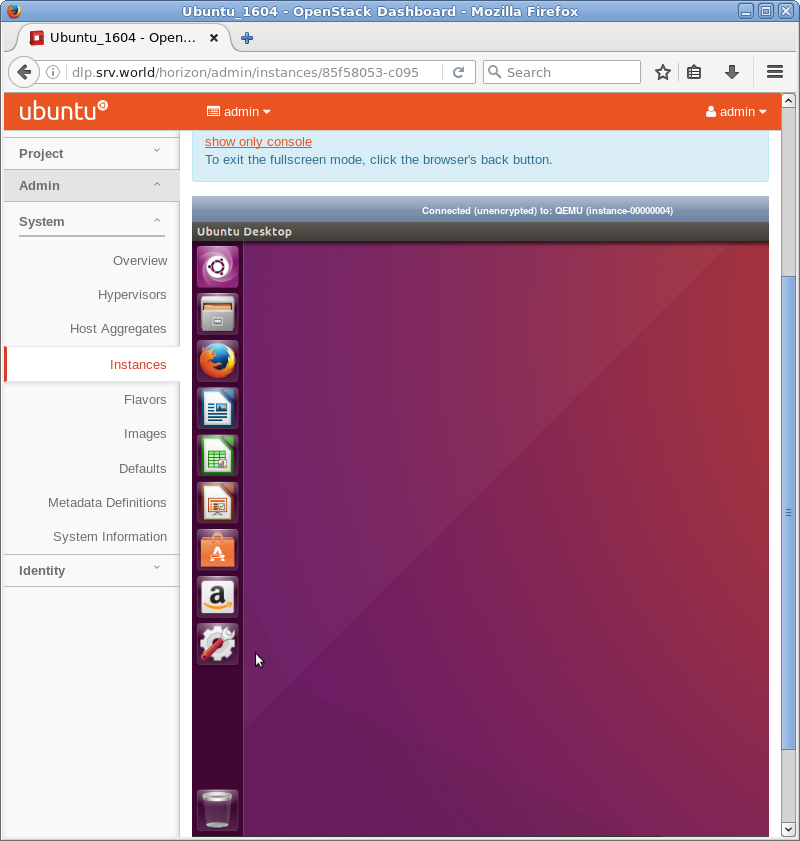
| [7] | The console of instance is shown. You can operate instances on here. |
|